

Xcode's interface builder is great for designing and prototyping an app UI, but some people (like me) like the feeling of control you get with a pure code interface.
In this tutorial, I'm going to show you how to programmatically set up a tableView that gets information from a GraphQL API.
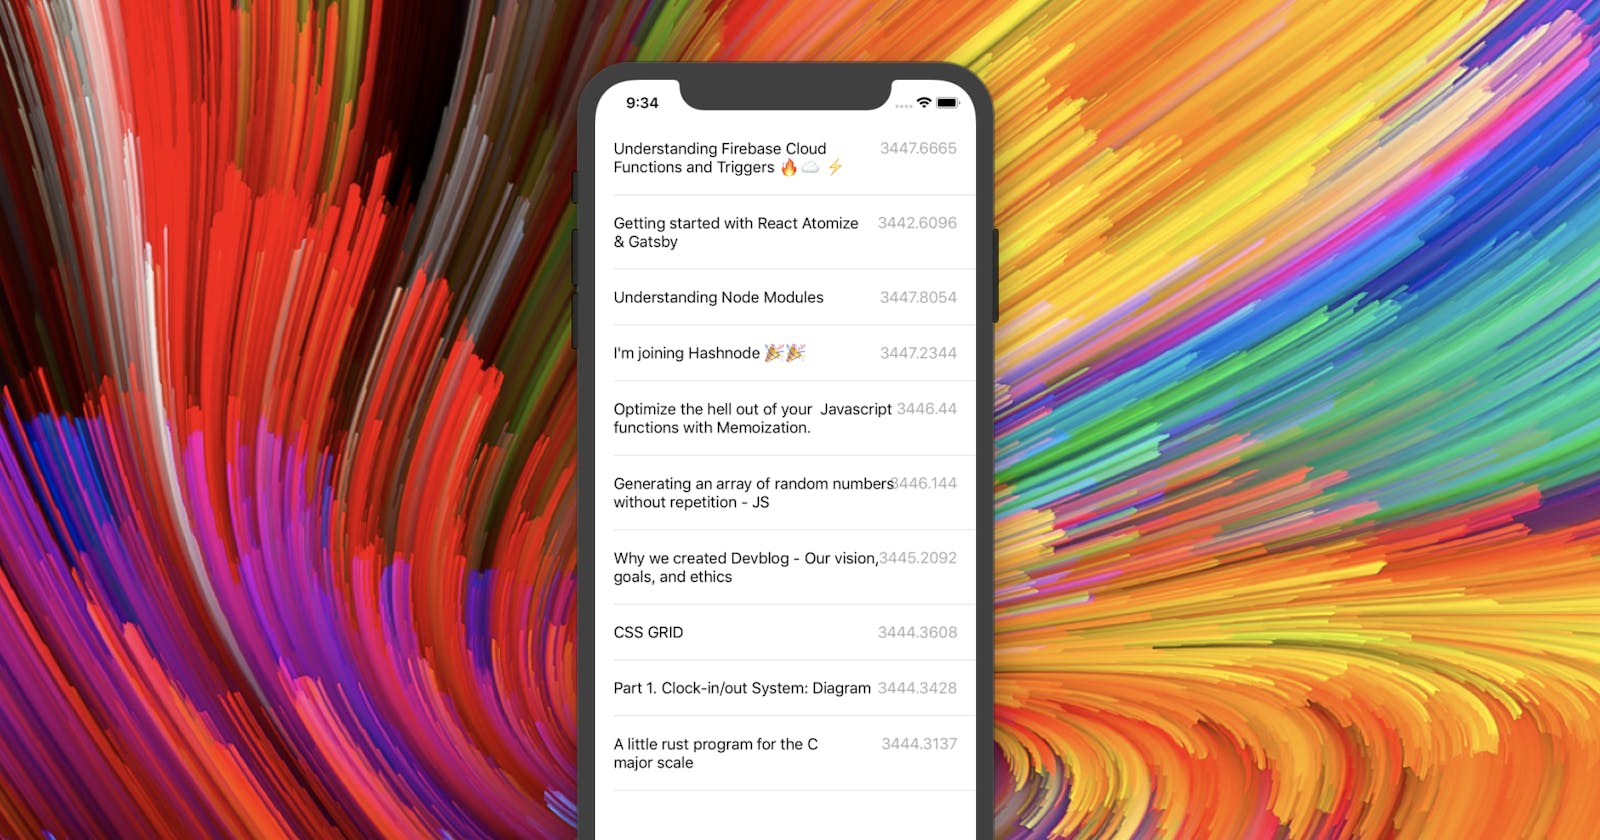
As a general overview, we're going to be making a tableView that fetches items from your Hashnode feed using the new GraphQL API! 😀
So, first things first, we'll create a new project in Xcode:
- Choose "Single-View app"
- Name it "HashnodeFeed" (or whatever you want)
- Choose "Swift" for your language
Now remember, we're not using storyboards today, so the next thing is to delete the Main.storyboard file!

Go ahead and delete the default ViewController.swift file as well.
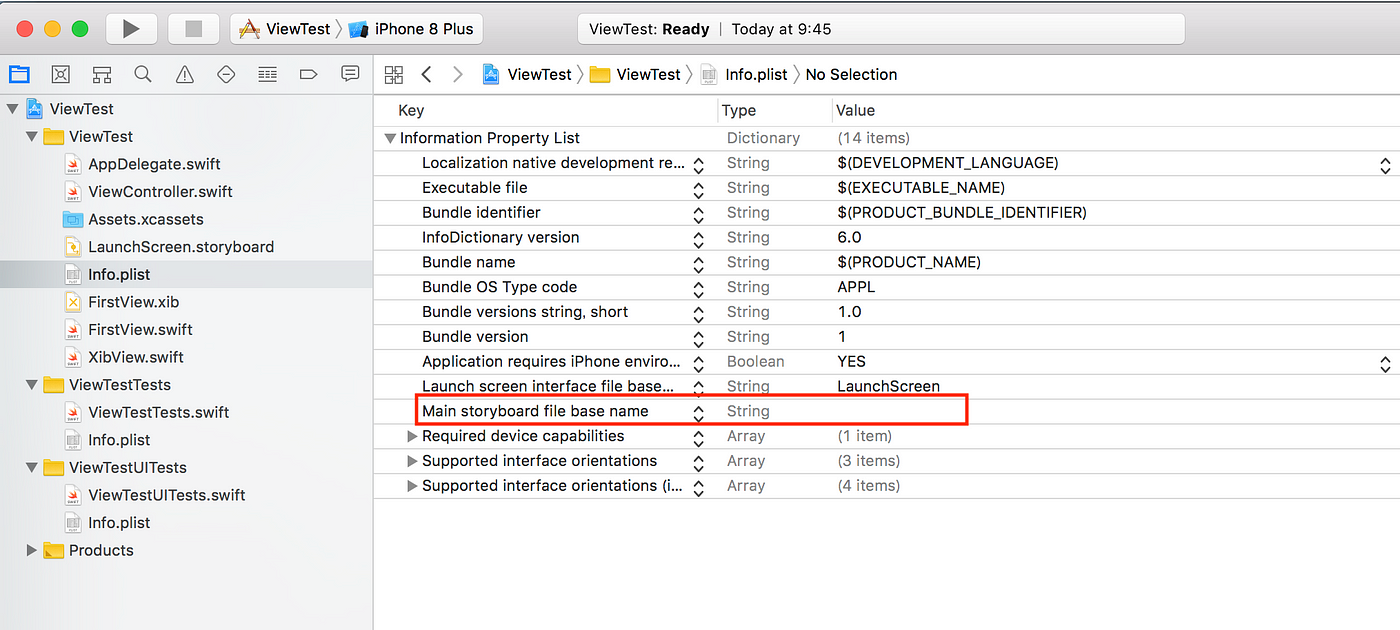
Next, edit your Info.plist file, and set the "Main storyboard file base name" value to blank:
Now let's create our main ViewController.
Select File -> New -> File, and select "Coca touch class".
In the next slide, name it HashnodeFeedTableViewController, and enter UITableViewController for its "Subclass of:" field. Leave Swift as the language, and click through to finish creating the file.
Now, we need to edit our AppDelegate.swift file to make it display our new ViewController. To do so, modify the didFinishLaunchingWithOptions function like so:
func application(_ application: UIApplication, didFinishLaunchingWithOptions launchOptions: [UIApplication.LaunchOptionsKey: Any]?) -> Bool {
        // Override point for customization after application launch.
        self.window = UIWindow(frame: UIScreen.main.bounds)
        self.window?.rootViewController = HashnodeFeedTableViewController()
        self.window?.makeKeyAndVisible()

        return true
    }
Without going into too much detail, this basically creates a window and sets our view controller as the root view controller of that window.
Now, there are multiple ways you could go about setting up the tableView with the REST API. The way I'm going to do it here is not necessarily the best way for your situation, but it will give you a general idea of how this works.
So, the first thing we need to do is create a subclass of UITableViewCell that will display our data. Using the same process as we did when creating the viewController, create a new file for this called FeedItemTableViewCell.swift that subclasses UITableViewCell.
The code for this file should now look like this:
import UIKit

class FeedItemTableViewCell: UITableViewCell {

    override func awakeFromNib() {
        super.awakeFromNib()
        // Initialization code
    }

    override func setSelected(_ selected: Bool, animated: Bool) {
        super.setSelected(selected, animated: animated)

        // Configure the view for the selected state
    }

}
Looking good 😀
Now let's define the layout. I'm only going to be displaying the "title" and "popularity" attributes of each feed item, so we'll have to create two UILabels to display those.
    let titleLabel: UILabel = UILabel()
    let popularityLabel: UILabel = UILabel()

    override init(style: UITableViewCell.CellStyle, reuseIdentifier: String?) {
        super.init(style: style, reuseIdentifier: reuseIdentifier)

        //Set the colors of the labels
        titleLabel.textColor = .black
        popularityLabel.textColor = .lightGray

        //This makes the titleLabel autmatically adjust its number of lines
        titleLabel.numberOfLines = 0

        //This prevents Xcode from automatically generating constraints, because we want to use our own
        titleLabel.translatesAutoresizingMaskIntoConstraints = false
        popularityLabel.translatesAutoresizingMaskIntoConstraints = false

        //Now we'll add the labels as subviews of the cell
        self.addSubview(titleLabel)
        self.addSubview(popularityLabel)

        //And now, we'll add constraints so they appear in the correct positions

        //The tops of the labels should equal the top of the cell + 20 (for a little bit of margin)
        titleLabel.topAnchor.constraint(equalTo: self.topAnchor, constant: 20).isActive = true
        popularityLabel.topAnchor.constraint(equalTo: self.topAnchor, constant: 20).isActive = true

        //The titleLabel should be on the left (With +20 for margin)
        titleLabel.leadingAnchor.constraint(equalTo: self.leadingAnchor, constant: 20).isActive = true

        //The popularityLabel should be on the right (with -20 for margin)
        popularityLabel.trailingAnchor.constraint(equalTo: self.trailingAnchor, constant: -20).isActive = true


        //We don't want the title to overlap the popularity, so we'll constrain it's width to 75% of the cell's width
        titleLabel.widthAnchor.constraint(equalTo: self.widthAnchor, multiplier: 0.75).isActive = true


        //Now, let's make sure the cell resizes to fit its content
        self.bottomAnchor.constraint(equalTo: titleLabel.bottomAnchor, constant: 20).isActive = true
    }

    required init?(coder aDecoder: NSCoder) {
        super.init(coder: aDecoder)
    }
But...if you run the app, you still don't see any of these cells. That's because we still need to load them into the tableView.
To do that, we're going to need some data to give those cells. This data will come from Hashnode's API, and will be stored in an array that we will iterate upon to load our cells.
We'll make a new function called getFeed in our HashnodeFeedTableViewController.
Our GraphQL query to Hashnode's API is:
{
    storiesFeed(limit: 10) {
        title
        popularity
    }
}
However, in the code, it appears in a URLEncoded format, so it's hard to recognize.
The code for the function is below; read the comments for an explanation of what it does (this is a lot of code, so look through it carefully):
    //To store our feed item data
    var feedItems: [NSDictionary] = []

    //For getting the feed
    func getFeed() {

        //Define our url
        let url = URL(string: "https://api.hashnode.com/graphql?query=%7BstoriesFeed%28limit%3A10%29%7Btitle%20popularity%7D%7D")!

        //Define a request with that URL
        var request = URLRequest(url: url)

        //We're using GET as our HTTP method
        request.httpMethod = "GET"


        //Now we create a "task" to make our request
        let task = URLSession.shared.dataTask(with: request) { data, response, error in

            //Make sure we don't have a networking error or something
            guard let data = data,
                let response = response as? HTTPURLResponse,
                error == nil else {
                    print("error", error ?? "Unknown error")
                    return
            }

            //Make sure we have a good status code
            guard (200 ... 299) ~= response.statusCode else {
                print("statusCode should be 2xx, but is \(response.statusCode)")
                print("response = \(response)")
                return
            }

            //Create a JSON object from the data
            let responseJSON = try? JSONSerialization.jsonObject(with: data, options: [])

            //Convert the JSON object to NSDictionary
            if let json = responseJSON as? NSDictionary {


            }

        }


        //Now execute the query
        task.resume()
    }
Hooray 🎉! We have a working HTTP request. Now we just need to load the data from the resulting NSDictionary into our array:
            //Convert the JSON object to NSDictionary
            if let json = responseJSON as? NSDictionary {

                //Unpack the "data" object
                if let hashnodeResults = json["data"] as? NSDictionary {

                    //Get the storiesFeed as an array of NSDictionaries
                    if let storiesFeed = hashnodeResults["storiesFeed"] as? [NSDictionary] {

                        //Now set our feedItems array to equal the storiesFeed
                        self.feedItems = storiesFeed

                        //Finally, we reload the tableView data to update the feed items
                        DispatchQueue.main.async {
                            self.tableView.reloadData()
                        }

                    }

                }

            }
Almost there! Now we just need to implement two UITableViewDelegate functions so the data actually loads into the items.
The first one numberOfRowsInSection, is pretty simple. Just return the length of the feedItems array:
override func tableView(_ tableView: UITableView, numberOfRowsInSection section: Int) -> Int {
        return feedItems.count
    }
The next one, cellForRowAt, is a little more work:
     override func tableView(_ tableView: UITableView, cellForRowAt indexPath: IndexPath) -> UITableViewCell {
        //Make an instance of our FeedItemTableViewCell
        let cell = FeedItemTableViewCell(style: .default, reuseIdentifier: "FeedItem")

        //Set the title text
        cell.titleLabel.text = feedItems[indexPath.row]["title"] as! String

        //Set the popularity text (I had to unpack the popularity value first)
        if let popularity = feedItems[indexPath.row]["popularity"] as? NSNumber {
            cell.popularityLabel.text = String(popularity.floatValue)
        }

        //Return the cell
        return cell

    }
As you can see, we're simply creating a new FeedItemTableViewCell and filling its values in with items from our feedItems array.
Now run it, and you should see something like this:
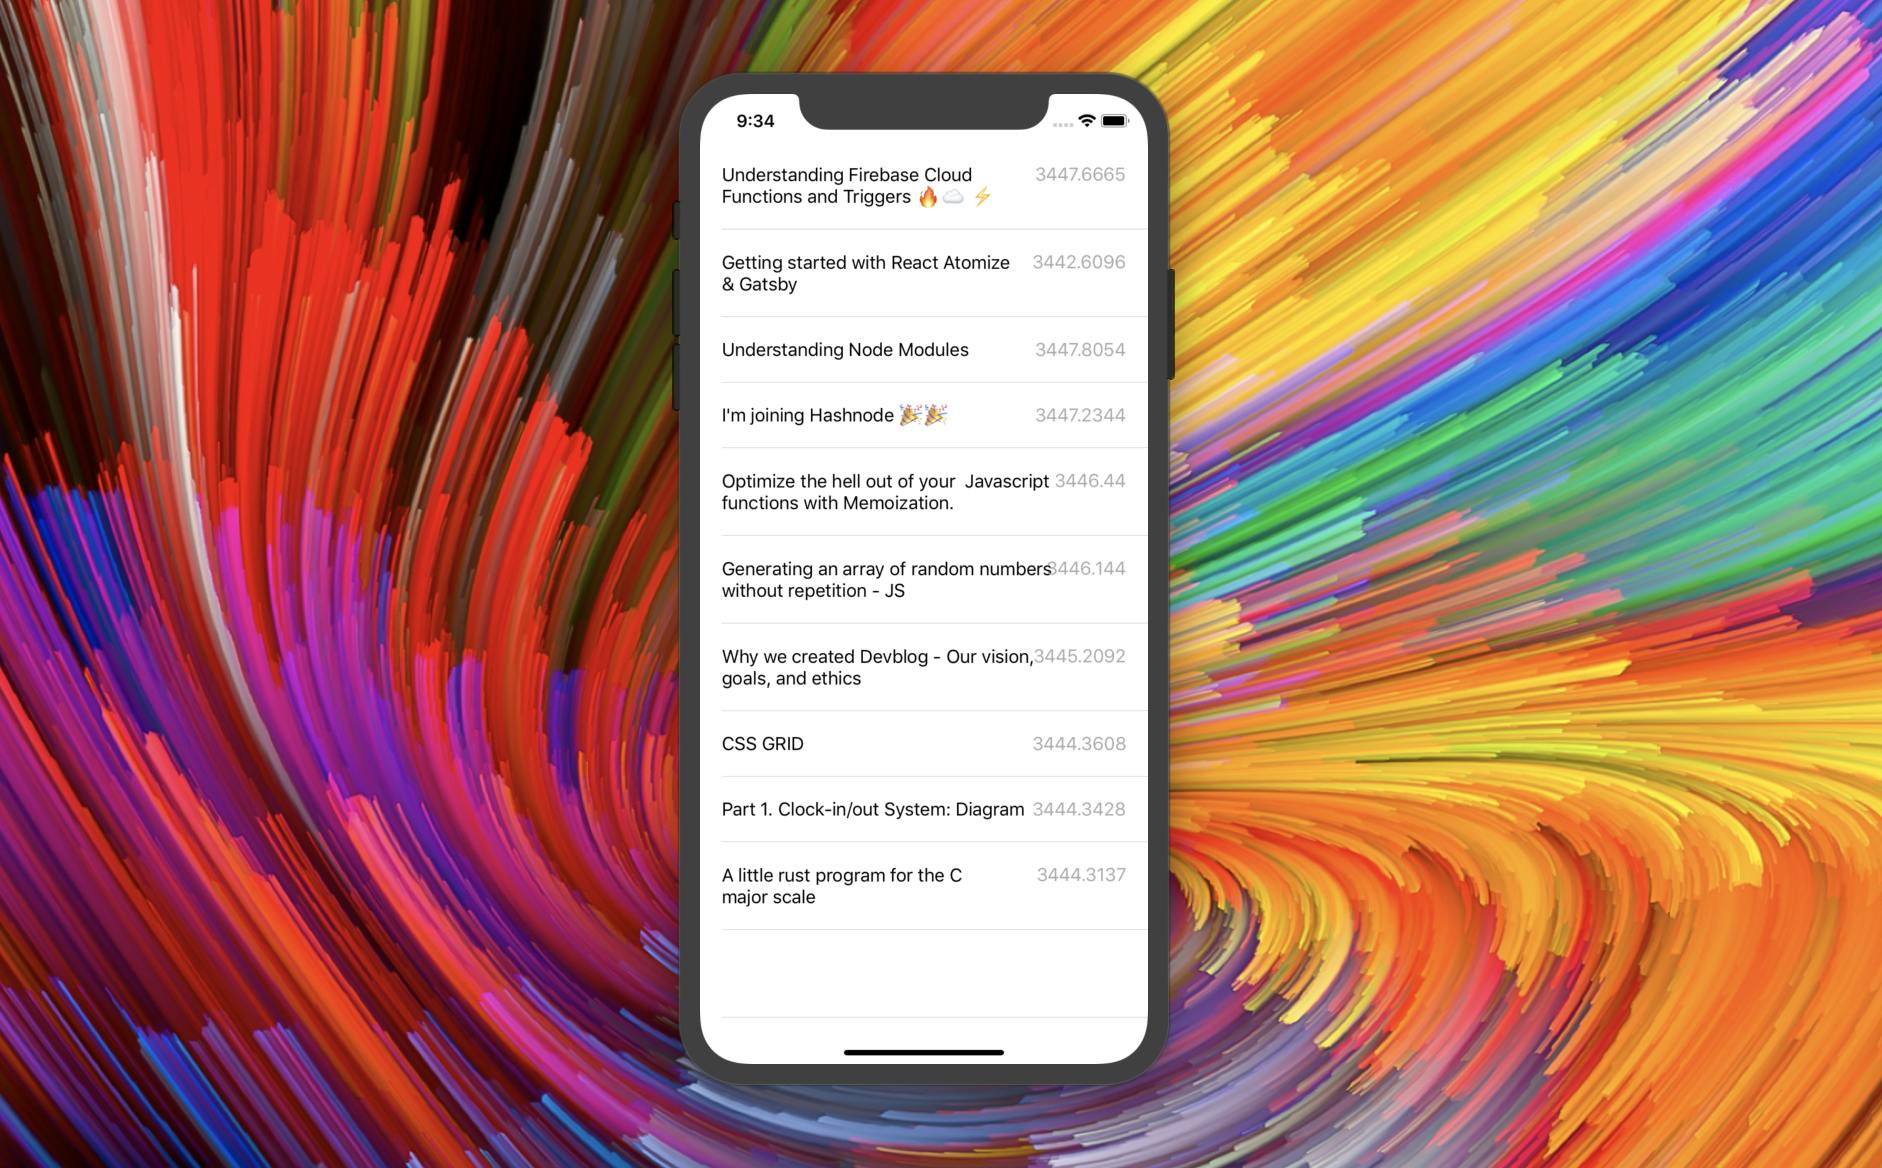
That's it! You're done 🎉!
Now you'll be able to make your own tableViews that fetch remote data.
If you have any questions, please feel free to ask me in the comments 😀!